为了使用miniFCU外设这几天在复习X-Plane12中的A330,
把起飞设置的几个问题写个小笔记。
先看upper ECAM信息栏如下:

于是把Auto Brk设定到Max;

设置扰流板预位GND SPLRS ARM时要把手柄往上拉起来;

为了使用miniFCU外设这几天在复习X-Plane12中的A330,
把起飞设置的几个问题写个小笔记。
先看upper ECAM信息栏如下:
于是把Auto Brk设定到Max;
设置扰流板预位GND SPLRS ARM时要把手柄往上拉起来;
几个月前在miniCOCKPIT订购的miniFCU(Flight Control Unit)终于送到,马上安装到X-Plane12上试了试手。
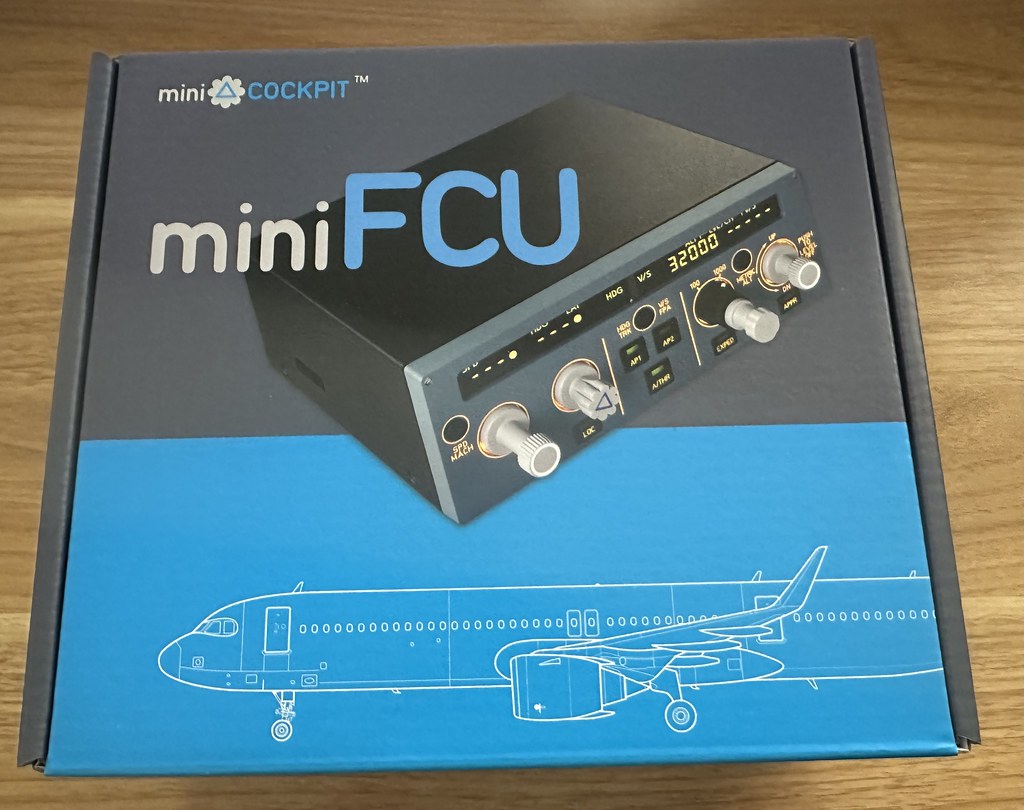

一开始在官网上把设备号登记,这样就可以享受一年的保修服务了。
首先安装插件,根据这里的介绍,
下载X-Plane12用的DLS miniCOCKPIT_mac_1.0.0.zip,
然后把插件拷贝到X-Plane的plugin目录下即可。
由于MacOS上插件Mac.xpl 不启动的问题,同样需要在系统设定的安全性设置里把Mac.xpl许可。
使用XP之前先测试一下设备的演示模式:
按住SPD MACH键不放,然后插上USB线给miniFCU供电,几秒之后就会进入demo模式。

把每个按钮和旋钮都试了一下,尤其是旋钮按下拉起的触感很舒服,甚是满意。
十年前的老文章 漫谈个人接受ACARS信号的方法 里介绍过接收VHF的ACARS信号,
卫星通信(SATCOM)中的ACARS又是什么样,稍微查了一下资料。
首先看马来西亚航空MH377失联事件的Wikipedia页面,
与卫星通信的信息如下:
飞行时间01:30 Inmarsat-3 F1卫星接收到七个握手信号中的第一个
飞行时间07:30 Inmarsat-3 F1卫星捕捉到飞机ACARS发出的最后一次完整握手信号,代表此时还在飞行
飞行时间07:38 计划外,透过飞机发出的无法解释的"部分握手"信号,在作业程序中须预留的抵达后余存燃油应所剩无几
飞行时间08:34 Inmarsat预定下次握手时间未收到飞机答复
Inmarsat即国际海事卫星组织, 同样可以通过Wikipedia看到Inmarsat提供的卫星服务:

Inmarsat-3 F1卫星的涵盖范围为印度洋地区, 发射日期为1996年4月3日,已经在太空中运行了28年。
正如大家所知,X-Plane团队正在以前所未有的速度增长。
其中一个结果是更新内容更多、涵盖X-Plane体验更多方面的大型更新,而12.1.0也不例外!
最初是一个以图形为重点的版本,我们的团队还实现了新的飞机系统、飞行模型改进、天气、ATC系统改进、对X-Plane专业版的增强,以及一种基于物理的摄像机,让你感觉就像真的随着飞机一起移动。
这个版本目前正在内部测试中,我们期待着尽快将其作为公共测试版发布。
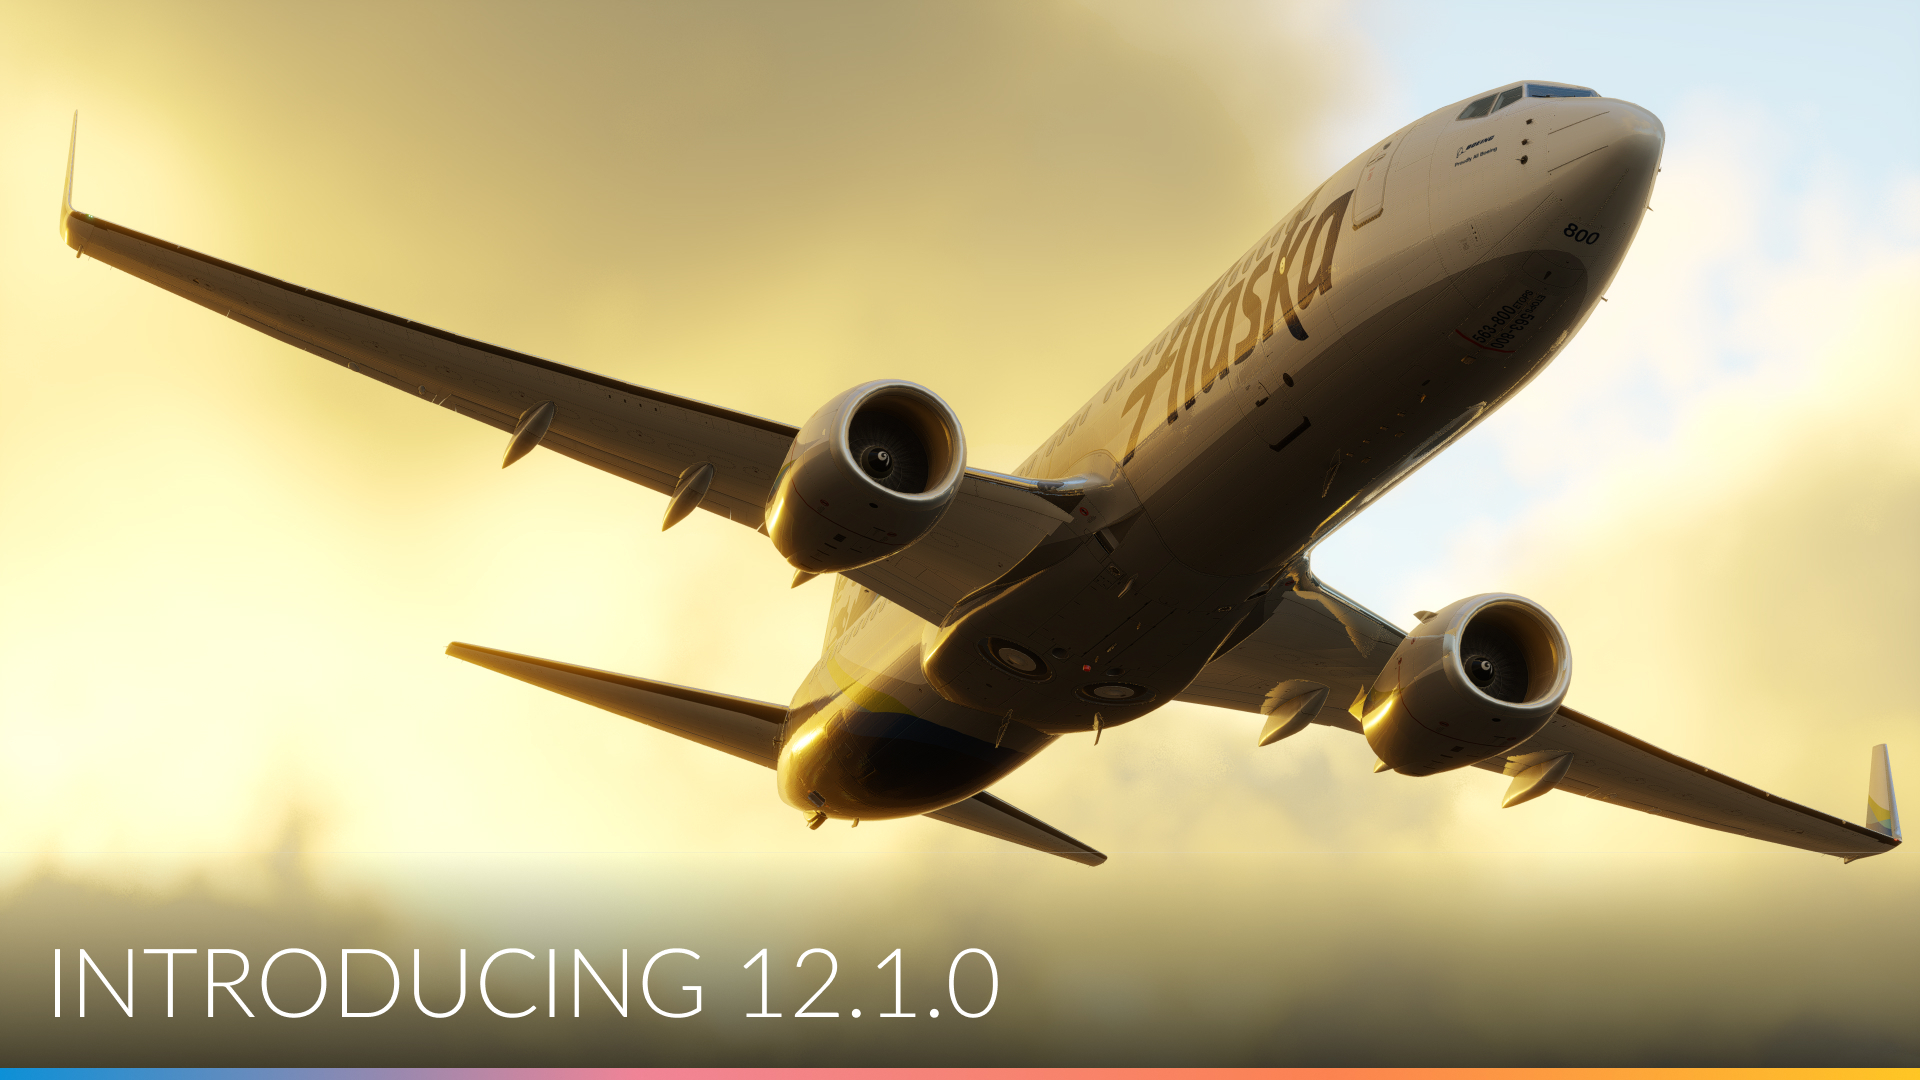
以下是你可以期待的内容:
官网上披露了12.1.0和12.2.0版本的开发计划,下面就翻译一下。
Blog Post Walk of Shame
两个快速商店说明:
我们在蒙特利尔宣布了X-Plane商店计划;Dellanie在那里有一个很棒的常见问题解答,但是对于开发者,我想要强调两点:
1. 我们不会封锁X-Plane。我完全理解为什么人们可能会认为我们会这样做,因为iPhone应用商店是(1)进行应用内购买的一个非常显眼的方式,而且(2)iPhone是封闭的。但我们不会这样做。您将所有东西导入X-Plane的方式仍然有效,包括附加组件安装程序、拖动文件夹等。通过商店进行购买不是必须的,所有现有的工作方式将继续有效。您不必为免费软件付费或重新购买任何东西。
2. 您不必一直在线。我们目前的政策是,如果您有在线许可证("XDD密钥"),您必须每两周或更长时间登录一次以更新它。我们不会转换为"一直在线"的模式 - 我们知道这对我们许多用户来说是不可能的,并且我们认为保持这种"时不时更新密钥"的政策是必要的。
X-Plane官方网站介绍了将要推出的"X-Plane商店"功能,这是一个大好消息,能省去用户管理插件的麻烦操作,非常值得期待。
Introducing: The X-Plane Store

下面就用ChatPGT把原文翻译一下,使用Prompt如下
你是一位专业中英文翻译,请向提问者提示,并把问题的英文翻译成中文。翻译过程为两步,第一步先用直译翻译,第二步对直译结果用自然的中文再此意译。
---
介绍:X-Plane商店!
我们正在将X-Plane插件体验提升到一个新水平,通过创建一个市场,开发人员可以直接在应用程序内向用户销售其产品。
这个平台将简化用户购买X-Plane内容的体验,并使开发人员能够继续为该平台做出优秀的工作。
以下是对您意味着什么以及一些我们在网上看到的常见问题的快速概述。
对于用户意味着什么:
1. 在线购物体验和X-Plane应用内的购物体验得到了简化。
2. 账户基础设施确保您购买的产品不会丢失(不再需要激活密钥!)。
3. 所有产品都有透明的评论。
4. 产品自动下载/安装/更新至X-Plane(不再需要在各个地方处理压缩文件)。
5. 对所有插件进行严格的质量审查,以确保高质量和安全性。
6. 版本兼容性筛选。
7. 简单、安全的付款方式。
今年夏天高温持续了3-4个月,无心出门拍照,所以有3个多月都没有摸相机了。
进入10月后终于有了些凉意,周六来羽田机场散散心。
一如既往的展望台来航空爱好者还是很多,
不过看微单使用者已成主流,像我这样的单反已成少数派了。

今天最意外的是一驾Hawker Beechcraft 350i King Air (B300),
在羽田如此小型螺旋桨飞机真是稀客了。
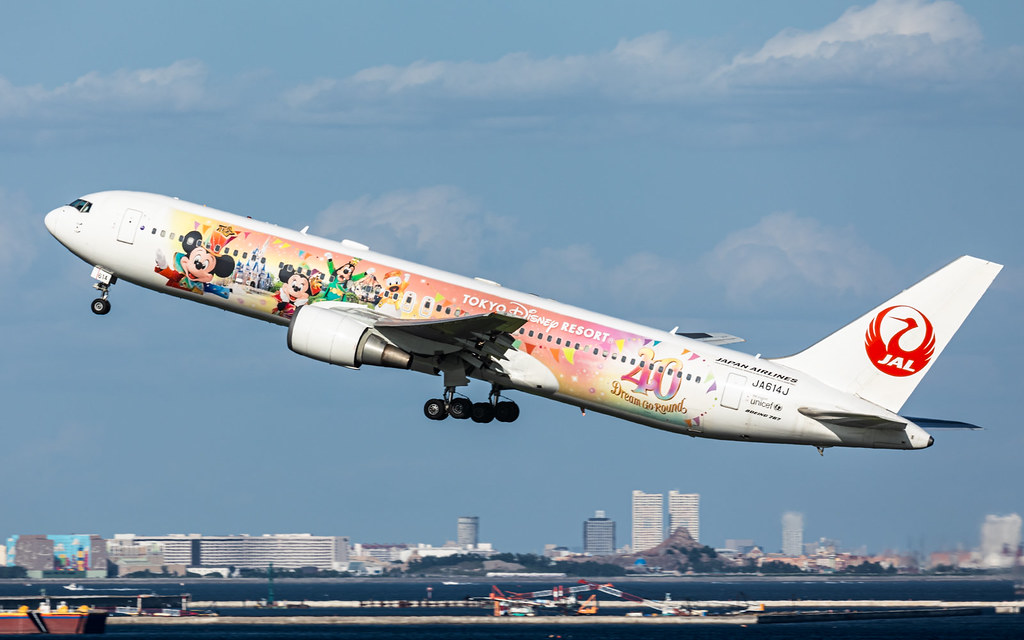
东京迪斯尼乐园40周年纪念彩绘机还是头一次看到,
构图上把东京迪斯尼乐园和这架波音767能放到一起也是不错。
Coming in X-Plane 12.0.8 and beyond - Roadmap Update
我们的团队目前正在准备X-Plane 12.0.8的测试版 - 我们预计在接下来的一两周内会有一些准备好的东西。
此次更新主要关注改进X-Plane飞行模型(用于确定模拟中飞机实际飞行方式的数学模型)、网络/多监视器以及用于与投影仪一起使用X-Plane的工具。
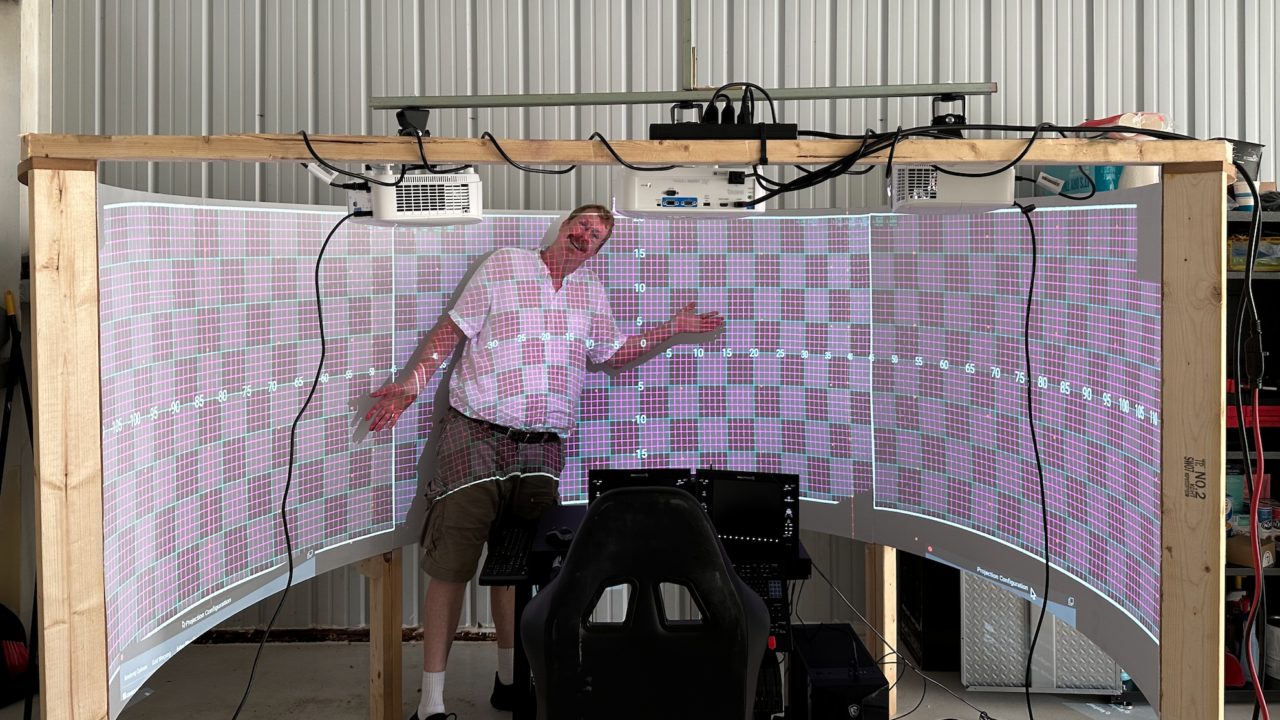
投影仪校正/混合
使用多个投影仪来显示你周围的世界是飞行模拟中的黄金标准。
但是有一个问题 - 当你将多个投影仪对准弯曲的屏幕时,每个投影仪的图像看起来都会奇怪而扭曲。
我们通过重新排列X-Plane发送到投影仪本身的像素来解决这个问题 - 从而产生一个视觉上正确的图像。
在幕后,这是由各种三角法和计算来支持的,但最终用户只需要将一个网格图案与他们的显示器对齐,然后就可以使用了!
这个功能将在我们的X-Plane专业许可证中提供。
发动机模型改进
Austin对X-Plane模拟引擎性能的方式进行了各种改进。
现在,喷气机、涡轮螺旋桨和往复式引擎更加精确地按照真实世界的测试数据进行模拟。
我们使用了普拉特·惠特尼(Pratt & Whitney)和菲利普·林格勒(Philipp Ringler)的数据,以确保一切都"准确无误"地运行。😉
X-Plane 12.06 Is Full of Many Things
内容还是靠ChatGPT的英中翻译完成的。
升级以后测试了一下,

我对新的云层还是非常满意的, 显示更接近于真实的云,而且性能不错,桢频毫无下降。
云和天气
自从X-Plane 12.0发布以来,我们一直在致力于改进云和天气系统的性能、准确性和质量。12.06版本实现了此多步骤过程的前两个阶段:
云层着色器现在更快,并且减少了伪影。丹尼尔重新编写了云层推进方式,修复了斑马条纹问题,并且总体上使画面不那么像素化和丑陋。
云层着色器还包含了用于卷云的专用路径,这应该比我们在12.0版本中拥有的卷层云看起来更好("高空非常薄的层状云")。
我和亚历克斯重建了构建每种天气类型的噪声函数,以获得外观更好的各种云层。
虽然其中包括了一些真实天气的修复,但我们并没有全面更新真实天气;我的想法是,如果没有适当的渲染,我们将无法确定真实天气是否真的有所改进。
即将推出的功能:在测试版2中,"Minecraft风格的云"(例如方块状的立方云,尤其是在真实天气下)将会被修复,所以在还能使用它们之前尽情享受。厚重的棱柱状卷云也将被修复,我们将优化预设和METAR解析。
未来展望:我们计划在3D云层后面添加一个2D的"云层外壳",以处理轨道视图,并使地球看起来不那么奇怪;而且我们将会对真实天气进行详尽的检查和优化。
下面的检查清单是为方便模拟飞行员而设计的,并根据X-Plane A330-300飞机进行了定制。这些与真实飞机的检查清单有所不同。
Cold and Dark to Engine Start 从冷舱状态到发动机起动
以下检查清单是真实程序的子集,仅包括从冷舱状态到发动机起动所需的基本步骤:
PARKING BRAKE - ON
TRANSPONDER - STANDBY
BAT1 - ON
BAT2 - ON
(EXTERNAL POWER) EXTA - ON
BEACON - ON
NAV LIGHTS - ON
APU BATTERY ON
APU MASTER - ON
APU - START
Wait for APU startup. (APU AVAIL displayed)